Factory Tour
I love factory tours. Everyone once in a while, I get to walk through a factory. Usually it is one of my clients who manufacture building products, but I’m also addicted to watching the show “How it’s made” as well. I’m always fascinated by how things get done. I did a pretty interesting 3d model today and thought I’d share a little window into how I do what I do. That will happen in the latter part of this post.
I Fired Myself Last Month

For those of you who do not know my story, I have been doing visual marketing as a side business for the last 15 years. Up until last month, I had a full time job as the Staff Architect at a local masonry trade association.
That’s right, I’m a quitter. John Acuff covered what it means to be a quitter in his book:
Quitter: Closing the Gap Between Your Day Job & Your Dream Job
I enjoyed it and highly recommend it to anyone looking to be their own boss. It’s been an exciting three weeks since I became a quitter and I’m adjusting well to seeing more of my beautiful wife and sweet little 1 1/2 year old daughter.
Factory Tour – 3d model & Photorealistic Rendering of a new product.
I have to admit, when I got a snapshot photo of this product, I was a little concerned about creating geometry that would accurately simulate this product. It’s a pretty goofy shape. The photograph I received looked like this :
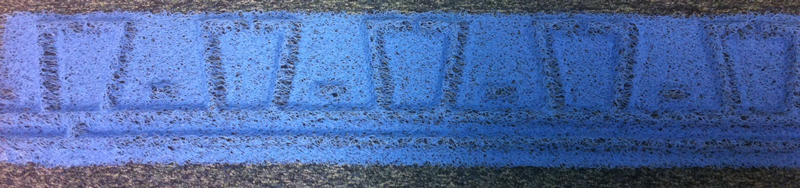
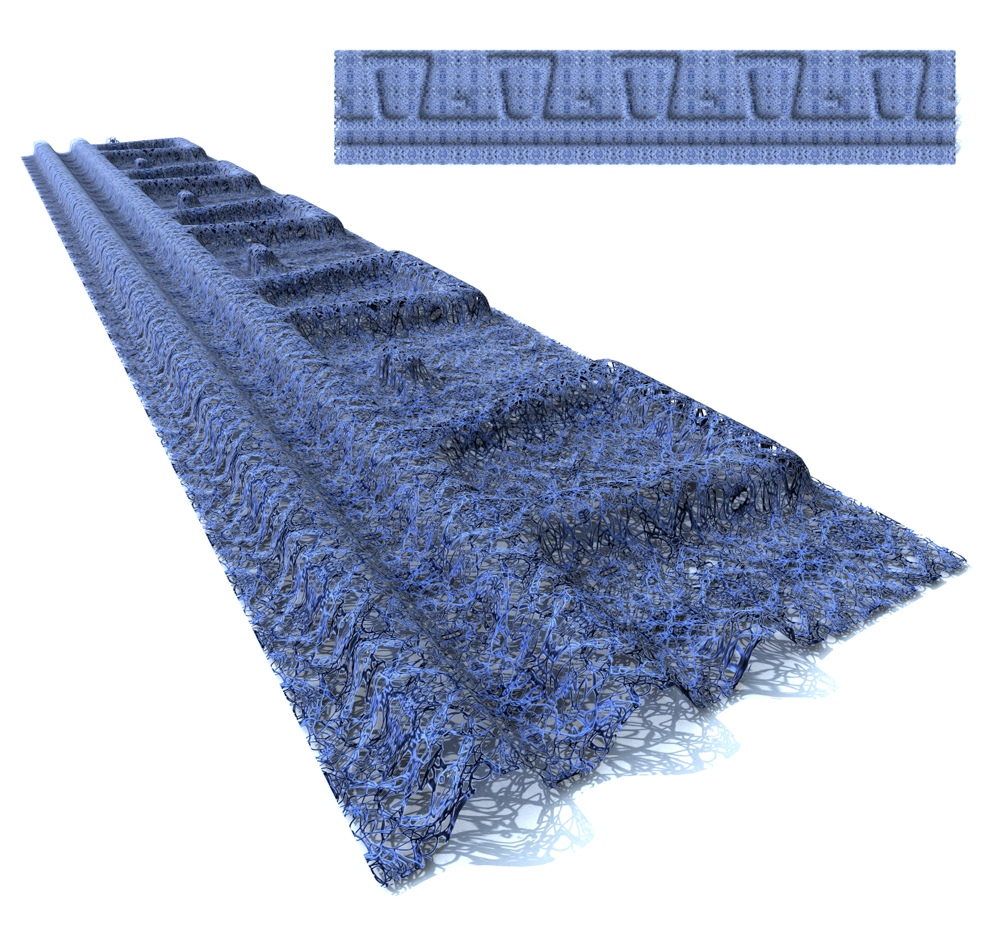
It is a drainage device for masonry walls, but that’s not important right now. What is important is that this thing is made of an open weave mesh and it is formed into this dovetail shape. It looks sort of like it goes into a press and gets pressed or stamped like a cookie sheet or something. Regardless I had to take some basic dimensions I was given and then make a flat object that warps up and down in a curved profile in this dovetail pattern.
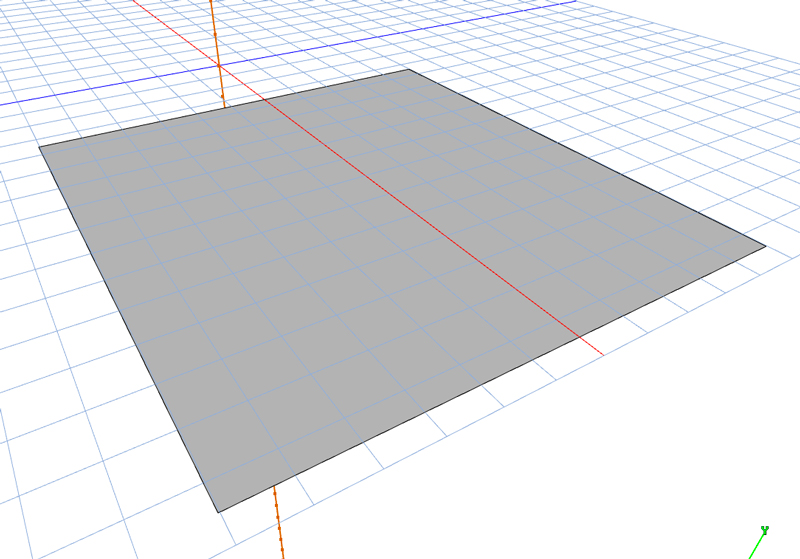
I broke it down into the most reasonable repeatable unit, which conveniently is one foot wide – with one dovetail in it. I created a flat polygon mesh that measured the height of the finished product – 11″ and the width of this repeatable unit 12″.
It looks like this :
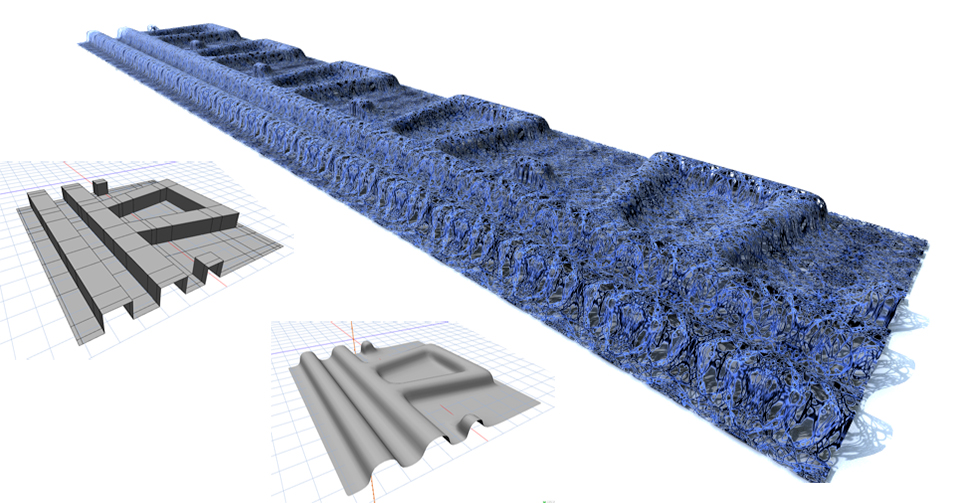
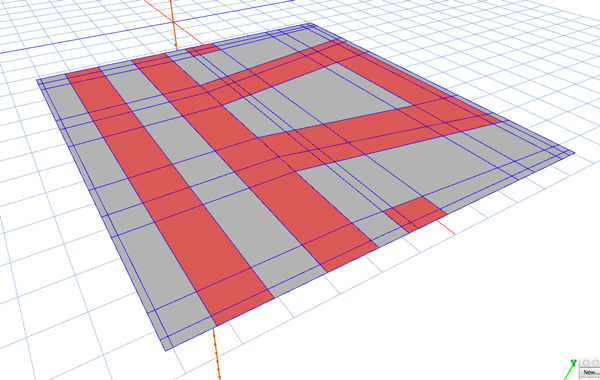
Then in two dimensions I subdivided the surface into a series of sections to control the mesh that will be created in later steps. I’m skipping a lot of boring stuff here, but all the extra lines will help me control the behavior of the surfaces, once I subdivide them. I have highlighted the faces that will be extruded out to create the desired shape :
Next I take those faces and extrude them upward creating the basic shape I will be needing. It’s still boxy and weird, but it’s getting there :
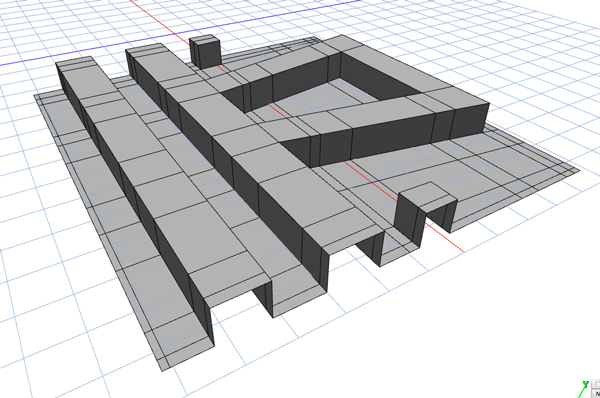
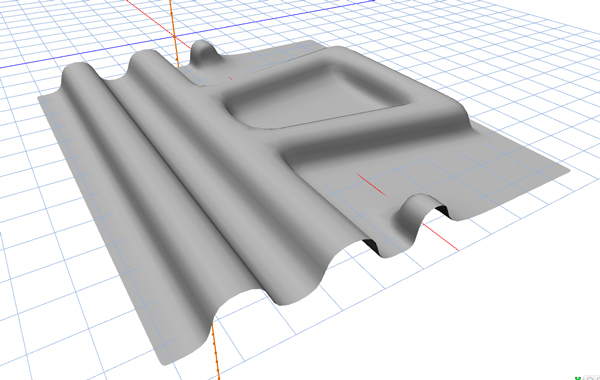
Now that I have all these control lines in place and the geometry the way I want it, I now can subdivide the surfaces :
Now we have a smooth mesh in which the subdivision system has used those control lines i put in to calculate a smooth surface. Thankfully I have drawn a similar product for this company that is also made of this open mesh material and have a texture already created for it. The texture involves taking a photograph of the mesh.
Using photoshop to make it tileable, meaning if it is repeated over and over it appears seamless. The same image is duplicated and using photoshop threshold filters, i turn the image into a black and white representation where white equals the actual object and black are the areas that will be transparent. Once I create the new texture, i simply define the blue color using the rgb values lifted from the original photo and then use my transparency mask to take out all the parts of the mesh you can see through.
This is what the transparency mask looks like – pretty strange looking, but the black parts will be transparent and the white parts will have the blue color from the original photo on it.
Texture applied – skipping a bunch of steps in the texture process but you get the idea. I then replicated the shape 5 times to arrive at the final product. Set up some lighting parameters and a ground plane and here is the result. Clicking on the image gives you a full size view.