
Introduction
Depending on the nature of the product, building product marketing can be a straightforward process, or it can be very challenging. For building products that are finish materials, like claddings and finishes, some photographs of a finished project are a no-brainer. When you are dealing with building products which are not part of the esthetic scheme of a design, or are hidden inside a wall never to be seen again, it is a much more challenging visual marketing exercise. When a not-so-attractive product needs to be visually demonstrated and displayed, 3d animations and video are the best solution. This case study demonstrates the power of 3d rendering and animation as an educational and persuasive sales tool, team training tool and customer support solution.
The Challenge
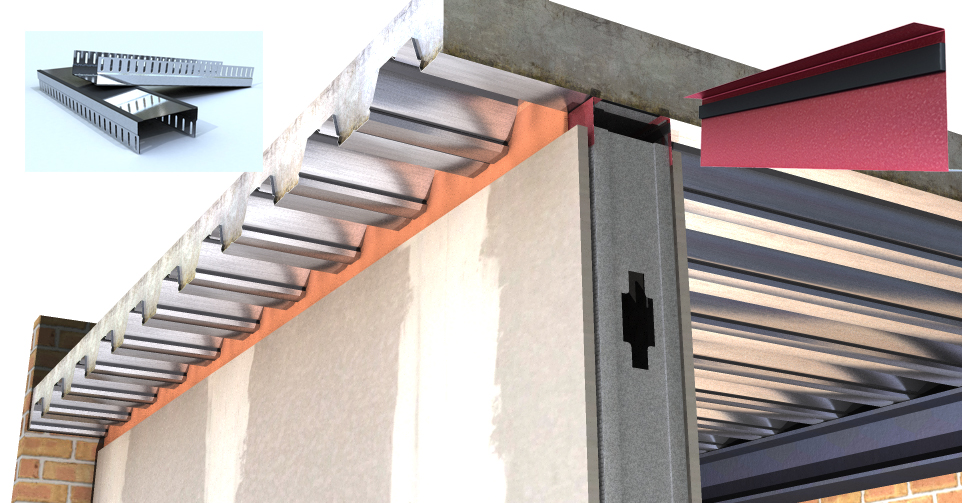
- Explain what the Cemco Fas-Track and Deflection Drift Angle are (features & benefits)
- Demonstrate how the product are installed in a wall
- Express why one should choose the products
- Take these rather mundane objects and make them look their best visually
Step One – Modeling, Texturing & Rendering the Products
The first step was to create 3d models of the products and create textures that realistically represent the building products for this animation. They are displayed below:

Tracksafe
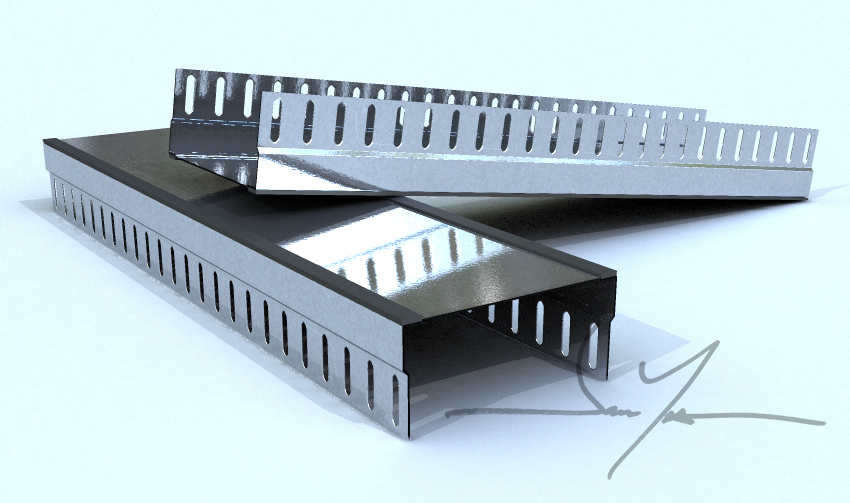
Fas Trak Rendering – 4-9-13
Step Two – Setting the scene
I chose to create a scene that had enough contextual information so the viewer knows we are looking at an interior partition in a structure with the desired construction type to best showcase this product without distracting the eye.
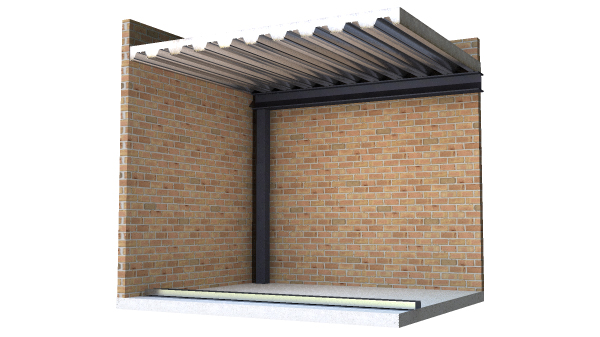
Scene Setup / Context
Step Three – Setting things in motion
Once the scene was setup and the necessary parts were modeled, I began the animation process by creating a storyboard that tells what is going to happen at what time. Once the storyboard is edited back and forth with the client and approved, the animation starts to take shape. Once all the parts are moving properly and everything is checked to be accurate, we move on to step four – annotation and narration.
Step Four – Annotation and Narration
This is where the microphone comes out and the narration explains what is happening. Text and other graphics are mixed in to make the presentation as clear as possible.
The Final Product
Testimonial
“I’m a product manager and I cover the entire US. Obviously I cannot accompany each salesman during their sales presentation but having a 2-1/2 minute video point out all the highlights of the system is huge help. Our customer’s time is very valuable and many times you only have a few minutes to pitch a product. The video gets directly to the point, pecks their interest and opens up the dialogue.”


